sandeep.net
Deploy to Dokku in 10 steps
Jan 1, 2021

Image by Science in HD
Dokku is an open-source Platform as a Service which makes it really easy to deploy your Docker application to a remote server. Let’s explore how we can deploy with Dokku in 10 steps. I’ll be deploying this sample Django project, so you can grab the source code if you want to follow along.
In this walkthrough, we’ll cover:
• Setting up Dokku on a remote server 🐳
• Configuring persistent storage 📦
• Adding a custom domain 🏷
• Configuring HTTPS with letsencrypt 🔒
Alrighty! Let’s get started! 😎
1. Spin up a linux box! 🐳
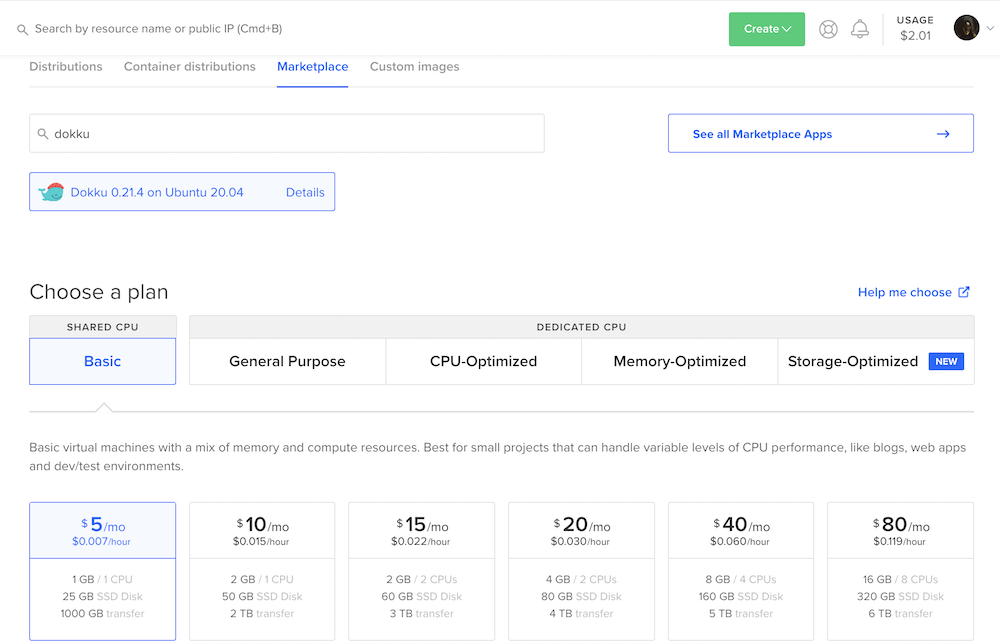
I’m going to use DigitalOcean to create a Droplet. I’m using a Dokku one-click install droplet, so that Dokku + Docker will already be installed on it.
2. Dokku setup 🐳
After the droplet has been created, navigate to the droplet’s IP address to complete the setup. For this walkthrough, my droplet’s IP address is 174.138.55.63.
You might see an nginx startup page, or even get a 502 Bad Gateway error. Don’t worry, that’s just Dokku setting itself up.
After a couple minutes, you’ll see the “Dokku Setup” page.
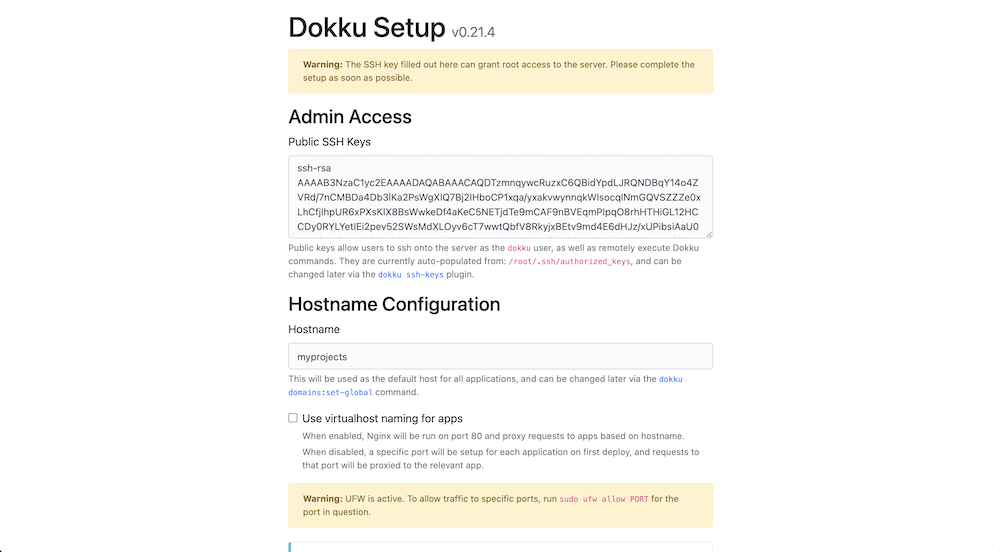
DigitalOcean should already prefill the SSH key on the Dokku Setup page.
If everything looks ok, click “Finish Setup” at the bottom of the page.
3. Create a Dokku application 🐳
Let’s SSH into the droplet (the linux box we just spun up).
ssh root@174.138.55.63
💡
Dokku provides a bunch of helpful info for each command.
Run
dokku COMMAND:helpto see details for any given COMMAND.
Lets create an app called “greetings” with
dokku apps:create greetings
You can view the list of Dokku apps with
dokku apps:list
4. Persistent storage 📦
Everytime we make a deploy, Dokku builds our application and starts a new Docker container. The old container is destroyed, along with all its data.
But sometimes we want data to “outlive” the container lifecycle. This is called persistent storage, and we can achieve this by mounting data from our droplet to our Dokku application.
According to the Dokku docs, it’s recommended that we put mountable data in the /var/lib/dokku/data/storage directory.
In this walkthrough we want to persist a SQLite database for our Django application. So let’s SCP it up to the droplet from our dev machine.
scp ./greetings.sqlite3 root@174.138.55.63:/var/lib/dokku/data/storage/greetings.sqlite3
Then in our droplet, we want to mount the SQLite db to the greetings application
dokku storage:mount greetings /var/lib/dokku/data/storage/greetings.sqlite3:/app/greetings.sqlite3
Finally, we can check the mounts for the greetings application with
dokku storage:list greetings
5. Deploy our application
On the droplet, initialize a git repository for the greetings application. This will allow us to push the repo from our dev machine to the droplet.
dokku git:initialize greetings
On your dev machine, make a new git remote that points to our droplet.
git remote add dokku dokku@174.138.55.63:greetings
Let’s deploy the application from our dev machine to the droplet with
git push dokku master
We’ll see a bunch of build logs. That’s Dokku building our application.
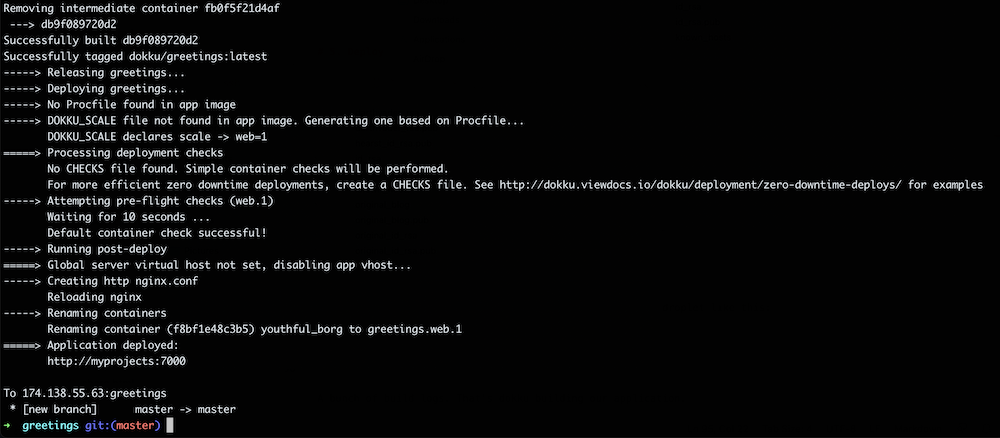
After a brief minute, the build should be successful, and it should be deployed to something like http://myprojects:7000
myprojects is the name of our droplet.
7000 is the port that the docker application is running on.
🙌 Yay our app is now deployed … but it’s not publicly accessible yet 😓
Why? … we’ll need to setup port forwarding rules for our greetings application.
6. Configure port forwaring 🏷
Dokku is listening on port 80, but it doesn’t know how to forward the request to our application (which is running on port 7000).
Let’s check the proxy settings for our app with
dokku proxy:report greetings
Now, lets configure Dokku to route traffic from port 80 to the greetings application on port 7000 with
dokku proxy:ports-set greetings http:80:7000
Now, we should be able to access our Dokku application on http://174.138.55.63.
💡
Our droplet is running Dokku, which is listening on port
80.We have configured Dokku to route traffic from port
80to our greetings application on port7000.
7. Add a custom domain 🏷
We need to set a domain for our Dokku app.
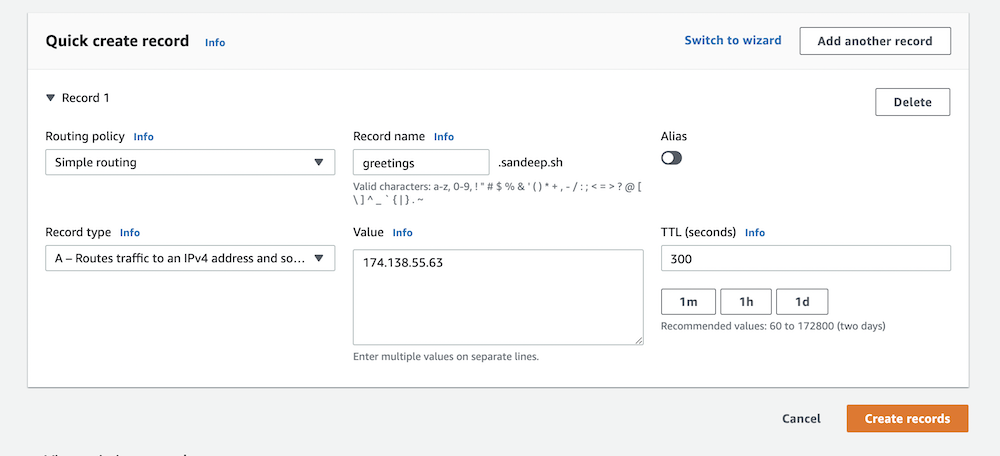
I’m going to use a subdomain of my personal site, greetings.sandeep.net
In your domain registrar’s dashboard, create an A record that points to the IP address of the droplet.
Then, configure the domain for the greetings application with
dokku domains:set greetings greetings.sandeep.net
8. Configure HTTPS with LetsEncrypt 🔒
We first have to download the lets-encrypt plugin for Dokku.
sudo dokku plugin:install https://github.com/dokku/dokku-letsencrypt.git
We should now have the letsencrypt community plugin command in Dokku.
Let’s set the DOKKU_LETSENCRYPT_EMAIL config in our app.
dokku config:set --no-restart greetings DOKKU_LETSENCRYPT_EMAIL=myemail@gmail.com
Check that the config has been set properly with
dokku config:show greetings
Then we can enable a letsencrypt certificate for our app with
dokku letsencrypt greetings
The certificate should be generated.
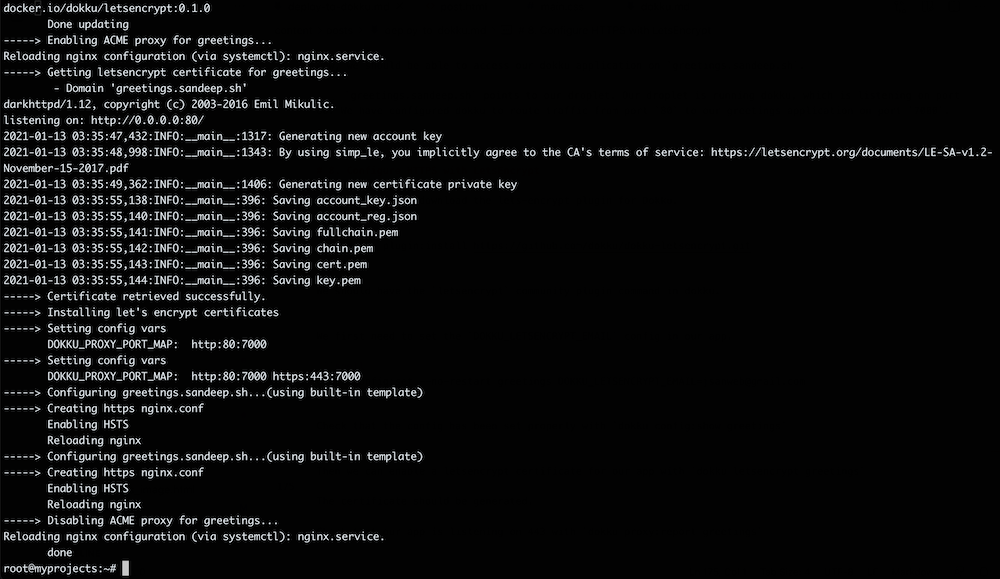
Check that our app is listening on port 443 with
dokku proxy:report greetings
9. Auto-renew LetsEncrypt certificate 🔒
Check the status of our certificates with
dokku letsencrypt:ls
We can setup a cron job to auto renew our certificate with
dokku letsencrypt:cron-job --add
10. View our live application!
Nice! Our application should be available on https://greetings.sandeep.net.

And we’re done!
As a quick recap, in this blog post we learned how to deploy a dockerized Django app to our Dokku server. We enabled port forwarding, configured persistent storage, setup a custom domain and enabled SSL with LetsEncrypt … all in 10 steps!
Have fun deploying your apps with Dokku! 🎉

Hey, I'm Sandeep! 
I like to write about Python, Go and occasionally music. Check out the blog for more stuff.